User Interface
In this chapter, You'll learn about user interface and different parts of Jenova Runtime. When you install Jenova and run Godot you may notice some changes to Godot interface, Let's learn about them.
Main Window
Jenova adds following controls to Godot main window :
Main Menu
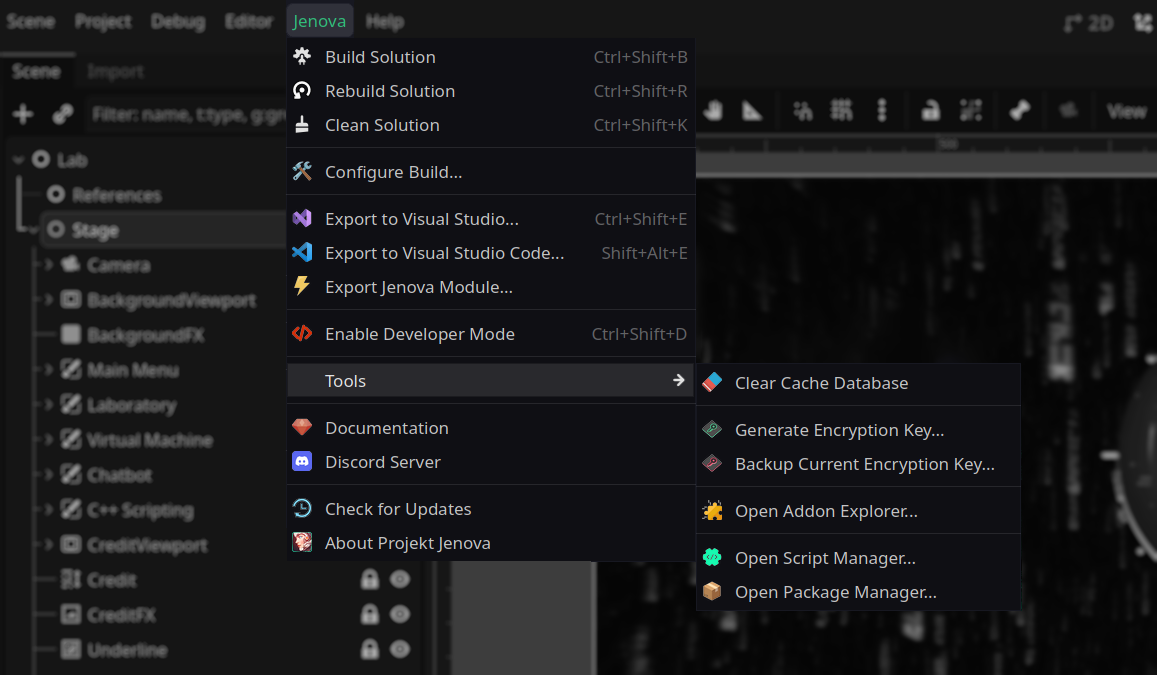
After installing Jenova you will notice a Jenova menu in your Godot Main Menu. This menu gives you access to all required parts of Jenova Extension.
-
Build Solution: Builds the entire project’s source files and loads the compiled module.
-
Rebuild Solution: Cleans Solution and runs Build command.
-
Clean Solution: Cleans Jenova cache, object files, preprocessed files, etc.
-
Configure Build: Opens Build Configuration window to set Compiler and GodotKit targets.
-
Export to Visual Studio: Exports Jenova Solution to Microsoft Visual Studio 2017+ for side-by-side integration.
-
Export to Visual Studio Code: Exports Jenova Project to Microsoft Visual Studio Code Editor.
-
Export to JetBrains CLion: Exports Jenova Project to JetBrains CLion IDE.
-
Export to Neovim: Exports Jenova Project to Neovim Code Editor.
-
Export Jenova Module: Exports the Jenova Module using various exporters like GDExtension Exporter.
-
Enable Developer Mode: Toggles Developer Mode; in Developer Mode, Jenova verbosely logs system activity and dumps data.
-
Clear Cache Database: Clears Jenova cache database; use when the compiler can't detect changes in scripts.
-
Reload Script Documentation: Updates custom script documentation provided by user from the filesystem.
-
Reload Script Templates: Refreshes Jenova Script Template Database from the filesystem.
-
Open Package Manager: Opens built-in Package Manager to install Compilers, GodotKits, Addons, etc.
-
Documentation: Opens Jenova Framework Learning Center in the default browser.
-
Discord Server: Opens Official Discord Server in the default browser.
-
About Projekt Jenova: Opens the About window with information about version.
NoteItems in the menu that are not listed above are not implemented yet.
Toolbar
To ease the compile process, Jenova adds a "Build Solution" toolbar button ![]() to quickly build the solution. If you hold Alt the build button changes to "Clean Solution" button
to quickly build the solution. If you hold Alt the build button changes to "Clean Solution" button ![]() to quickly clean entire Jenova Cache.
to quickly clean entire Jenova Cache.
You can customize the placement of the toolbar icons in Jenova Settings. Additionally, you can customize the build process after pressing the button. For example, you can set it to a mode that runs the game after each build or builds the project before every game launch.
By default, Jenova always loads the built module into the Godot Editor at startup. If you experience a crash at startup due to a corrupted cache file, Simply run Godot with the --Clear-Jenova-Cache command line option.
godot --editor --path "C:\MyGameProject" --Clear-Jenova-Cache
Terminal
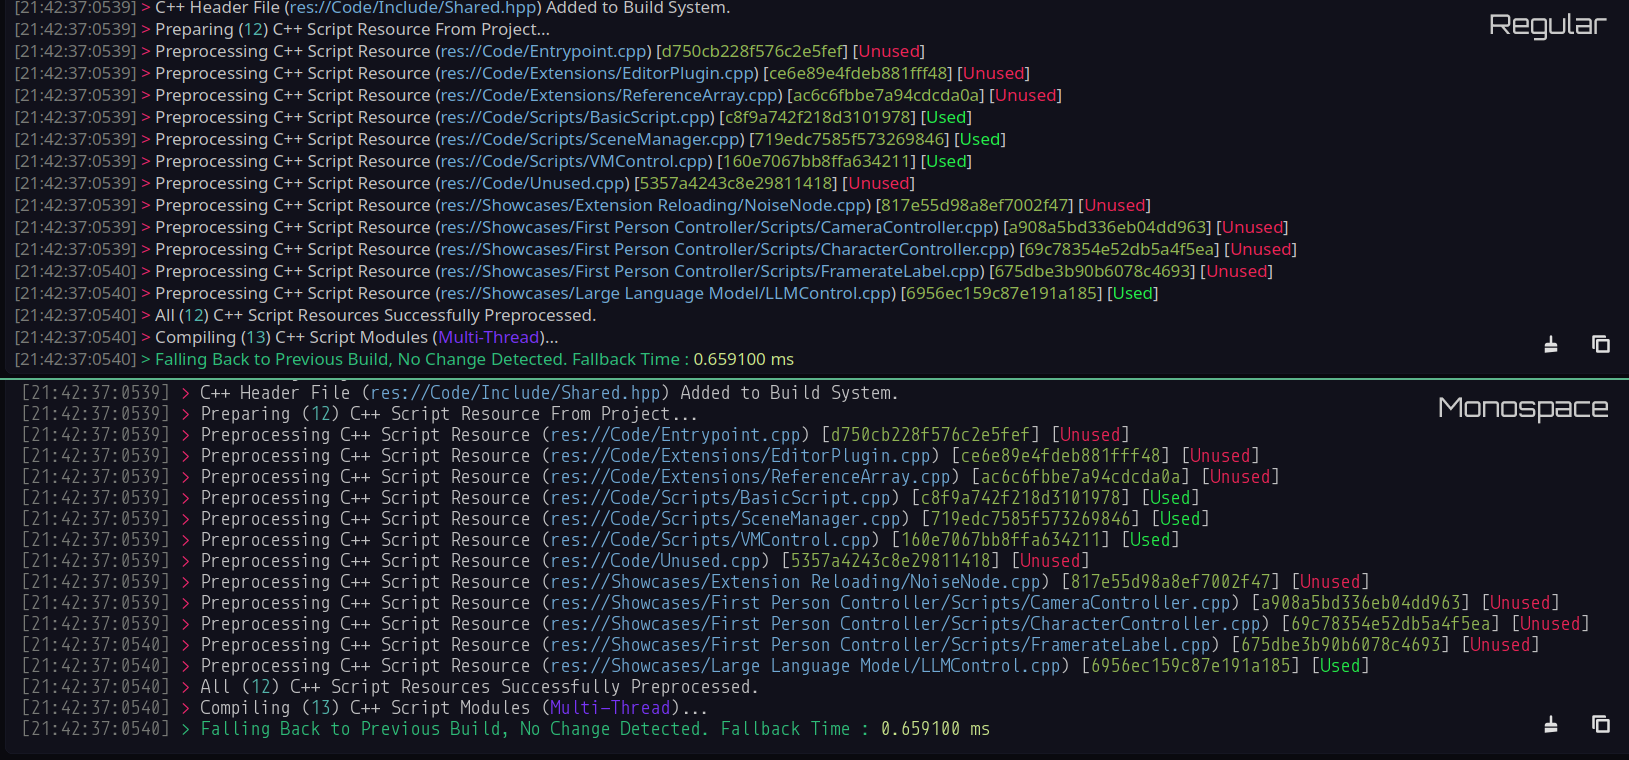
Jenova introduces a built-in terminal designed to provide more accurate logging and includes a high-resolution timestamp for logs. You can disable the Jenova Terminal in Jenova Settings or redirect logs to the Godot Native Output window.
Settings
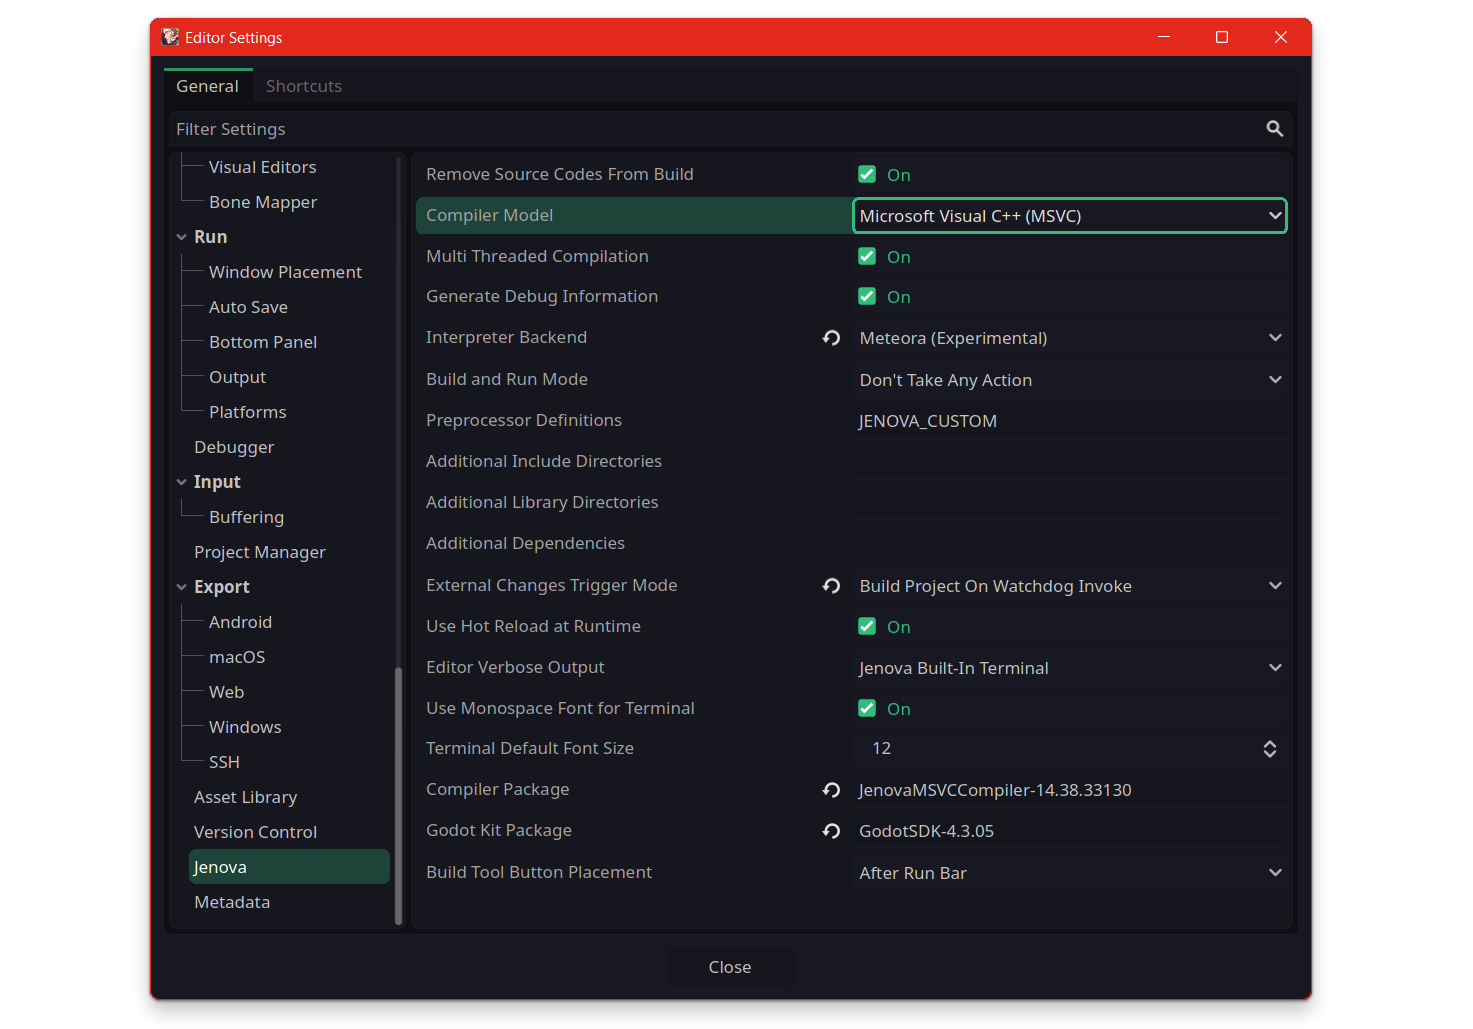
Jenova Runtime adds a new tab to your Editor Settings. Jenova offers a variety of configurations that can be customized to fit user preferences. You can access it by navigating to Editor > Editor Settings... and selecting the Jenova tab.
Remove Source Codes From Build
When enabled, Jenova Deployer strips all C++ source codes from the build package. This option prevents leaking your C++ scripts in your Godot build.
Compiler Model
Sets the current Compiler backend for Build System, Available options are :
Windows Compilers :
- Microsoft Visual C++ Compiler (MSVC++) Implemented ✅ [ Default ]
- LLVM Toolchain (Clang-cl) Implemented ✅
- MinGW Standard (G++) Implemented ✅
- MinGW LLVM Toolchain (Clang++) Implemented ✅
Linux Compilers :
- GNU Compiler Collection (G++) Implemented ✅ [ Default ]
- LLVM CLang Toolchain (Clang++) Implemented ✅
To use MSVC++ and Clang-cl, you need a runtime distribution built with either MSVC++ or Clang-cl.
The same applies for MinGW compilers; your runtime distribution must be built with G++ or Clang++.
Multi-Threaded Compilation
When enabled, C++ scripts will be compiled in parallel using multi-threading. By using Multi-Threaded Compilation Jenova uses maximum power of the processor to compile scripts.
Generate Debug Information
When enabled, Compiler generates debug symbols and Jenova Module Mapper assigns them to the loaded module. Also if your code leads to a crash the dump file will provide full information on Call Stack, Locals etc.w
Interpreter Backend
Sets the current Interpreter backend for Runtime, Available options are:
- NitroJIT (Powered by AsmJIT)
- Meteora (Powered by TinyCC)
📖 Learn more about Jenova Interpreter Backends
Profiling Mode
Sets the current Profiler mode for Runtime, Available options are:
- Disabled [ Default ]
- Echo
- Sentinel
- Monitor
Since Godot lacks an API for native profiler integration, Jenova provides a dedicated profiler for script execution metrics.
For advanced C++ profiling, you can use the Jenova Code IDE.
⚙️ Requirement : A project rebuild is required for this option change to take effect.
📖 Learn more about Jenova Profiler
Build and Run Mode
Defines the behaviour of the build system before/after a successful build. Available options are :
- Run Game After Successful Build
- Build Project Before Running Game
- Don't Take Any Action [ Default ]
Preprocessor Definitions
Sets custom preprocessor definitions to use within all scripts. It supports 3 types of Macros :
- Flag Macros (
#define USE_CUDA_COMPUTE) - Value Macros (
#define LEGEND_NAME "Chester Bennington") - Function Macros (
#define ADD_10(num) num+10)
Additional Include Directories
Sets additional paths to include external headers in Jenova Build System.
Example : C:\cuda_11.7.0_516.01\include;C:\qt-5.15.3-static-msvc2019-x86_64\include
Additional Library Directories
Sets additional paths to include external libraries in Jenova Build System.
Example : C:\cuda_11.7.0_516.01\lib\x64;C:\qt-5.15.3-static-msvc2019-x86_64\lib
Additional Dependencies
Sets additional dependencies and symbols to link against in Jenova Build System.
Example : cuda.lib;cudart.lib;cudadevrt.lib;Qt5Core.lib;Qt5Widgets.lib;Qt5Network.lib
Custom Compiler Commands
Sets user-defined compiler instructions in Jenova Build System.
Example : /fp:fast /volatile:iso /arch:AVX2 /permissive- /FAcs
Custom Linker Commands
Sets user-defined linker instructions in Jenova Build System.
Example : /ENTRY:preload /EMITPOGOPHASEINFO /SECTION:.text,EWR
External Changes Trigger Mode
Defines the behaviour of execution when a script file changes externally. Available options are :
- Build Project on Script Reload
- Build Project on Script Change
- Bootstrap Project on Watchdog Invoke
- Don't Take Any Action [ Default ]
Watchdog Invoke vs Script Reload/Script Change
There's a difference between three methods, Watchdog Invoke method is used with external build systems which works with a feature in Jenova Build System known as "Bootstrapper". The process involves compilation in an external compiler and when a module is produced, Jenova Symbol Parser kicks in and extracts Metadata then loads the compiled module. On the other hand, Script Reload watches over externally applied changes to C++ script files. If a change is detected it triggers a build inside Godot itself.Script Change is almost identical to Script Reload. The only difference is that Script Reload uses Godot reload mechanism while Script Change uses Jenova Asset Monitor and it triggers a build even if your game engine isn’t in focus.
This feature works hand in hand with Build and Run Mode to create a seamless development experience. This feature can also be used to add any custom editor to your workflow such as VSCode, NeoVim, etc.
📖 Learn more about Jenova Hot-Reloading System
Use Hot-Reload at Runtime
When enabled, While you are running a game in Debug Mode (Play Mode) from the Godot Editor, If you build the project it automatically performs Hot-Reload in all running instances. Use this option carefully.
The process establishes a bidirectional connection between Jenova Runtime in Godot Editor and Jenova Runtime in all running instances. When a new Jenova Module is successfully created, It queues a reload command and broadcasts it to all connected instances. Upon receiving the signal the instances perform an internal Hot-Reload.
📖 Learn more about Jenova Hot-Reloading System
Editor Verbose Output
Sets the behaviour of verbosing. It switches between printing in the Godot Output Window and Jenova Built-in Terminal.
- Standard Editor Output
- Jenova Built-In Terminal [ Default ]
- Disabled
📝 Note : It's recommended to use Jenova Built-in Terminal but if you experience any kind of crash or error before Jenova installation in the editor, Switch to Standard Editor Output.
Use Monospace Font for Terminal
When enabled, Jenova Built-in Terminal uses a monospace font which results in a more programmer-friendly experience.
Terminal Default Font Size
Sets the default font size used for the Jenova Built-in Terminal. This value is affected by the Godot global User Interface factor scale.
Compiler Package
Defines the current Compiler package used in Jenova Build System. This value is set by the Build Configuration window but can be set manually for custom compiler packages.
Godot Kit Package
Defines the current Godot SDK package used in Jenova Build System. This value is set by the Build Configuration window but can be set manually for custom compiler packages.
Managed Safe Execution (MSE)
When enabled, the Jenova Runtime executes C++ machine code within a managed execution context ensuring crash-proof execution.
If your C++ code contains bugs or errors that would typically cause a crash, MSE feature intercepts these issues and reports them as script errors allowing the game to continue running without interruption. This feature is beneficial for beginners and newcomers to the C++ language, enabling them to experiment freely with their code without the fear of crashing the engine.
⚙️ Requirements :
- A project rebuild is required for this option change to take effect.
- Managed Safe Execution is powered by an exclusive feature of Windows.
Other operating systems such as Linux and macOS do not support this capability by design.
Use Built-in Jenova SDK
When enabled, all C++ scripts automatically gain access to JenovaSDK without needing to manually include its header. This option is enabled by default but remains customizable to maintain compatibility with legacy Jenova projects that required explicit header imports.
Refresh Scene Tree After Build
When enabled, after each successful build, the SceneTree will receive an update. This feature is useful when working with Properties in your script, when you add or remove properties in a C++ script while the assigned node is selected, the Inspector gets updated after the rebuild.
📖 Learn more about Properties
Custom Package Database URL
Allows you to specify a custom online package database URL for the Jenova Package Manager.
This enables the use of your own package repository instead of the default Jenova Official Package Repository.
📖 Learn more about Custom Databases
Package Repository Path
Sets the respostiory directory path where Jenova Packages will be installed.
By default, Jenova Package Manager installs packages locally within the project at res://Jenova/Packages
Setting this option to a shared path allows reuse of installed packages across multiple projects without requiring reinstallation.
Examples : C:\Users\Username\Documents\Jenova-Packages C:/Jenova/Packages /home/jenova/packages
📖 Learn more about Jenova Packages
Build Tool Button Placement
Sets the placement of the Build/Clean Tool Button in the main toolbar. Available options are :
- Before Main Menu
- After Main Menu
- Before Stage Selector
- After Stage Selector
- Before Run Bar
- After Run Bar [ Default ]
- After Render Method
In newer versions of Godot you may need to check the Advanced Settings to see the Jenova tab.
Now that you've reached this point in the documentation, You've gained a good understanding of the Jenova Framework. From here, you can explore both Basic and Advanced topics. Start coding with Jenova today and take your projects to the next level!